How I printed Nintendo E-Reader cards so they work
The Game Boy Advance had a device called the E-Reader. It can scan physical cards which contain a dotcode pattern. The E-Reader converts those dots into binary data and executes it.
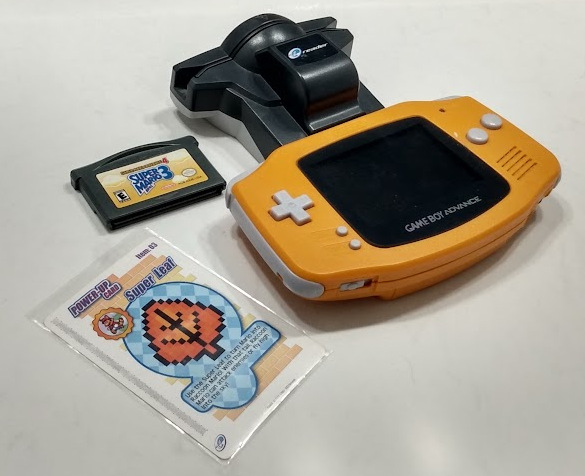
Have you ever wanted to print your own cards and failed? I sure have, holy cow. But I finally got it to work.
Here is what worked for me and some tips.
Make sure the dotcodes remain sharp
I was working on making a custom E-Reader card with graphics, to make it look more like an official one. I didn't realize it at the time, but the graphics software I was using had imported the dotcode images with softening/anti-aliasing on them. They looked this
and when they are like this, they won't print correctly. They will come out grey and "soft". They should look like this
Use glossy paper
I have found the glossier the better. Glossy paper is very smooth. When viewed through a jeweler's loupe, there's almost no discernable texture at all
Compare that to a printout on matte paper
To the naked eye you can't see it, but through a loupe it almost looks like cottage cheese :) That texture fights with and confuses the camera, making a successful scan virtually impossible.
Official Nintendo E-Reader cards were printed on a semi-gloss paper that has a little bit of texture. But you're fighting an uphill battle, the less texture you have the better.
Use a 1-bit, black and white image
If you created your dotcode images with raw2bmp or other E-Reader printing tools, they will create a 1-bit image. That means the image only has black and white in it. That is what you want. If the image is fully color, even if it only has black in it, the printer will print it differently.
In The Gimp, the image will be "indexed" if it is 1-bit

And if you look at the color palette for the image (Windows menu > Dockable Dialogs > Colormap), you should see the palette is just white and black.
Here is a dotcode 1-bit image loaded into Aseprite
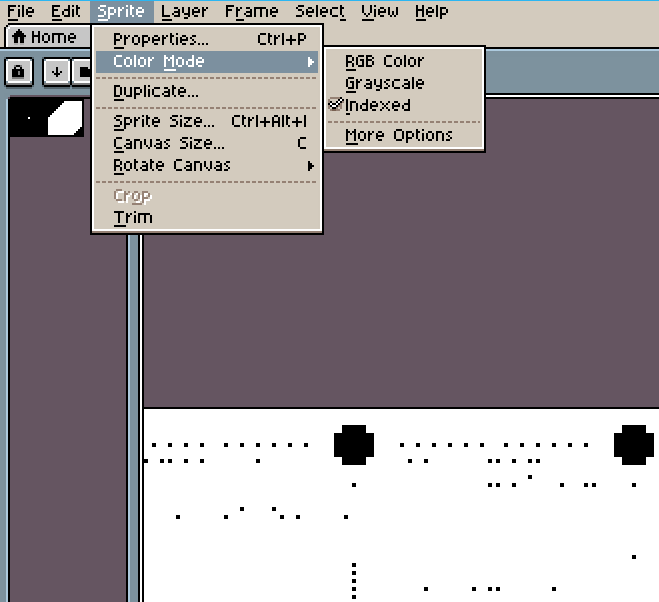
Again it is shown as "indexed", and the palette only has black and white in it.
Photoshop and other image programs should be very similar.
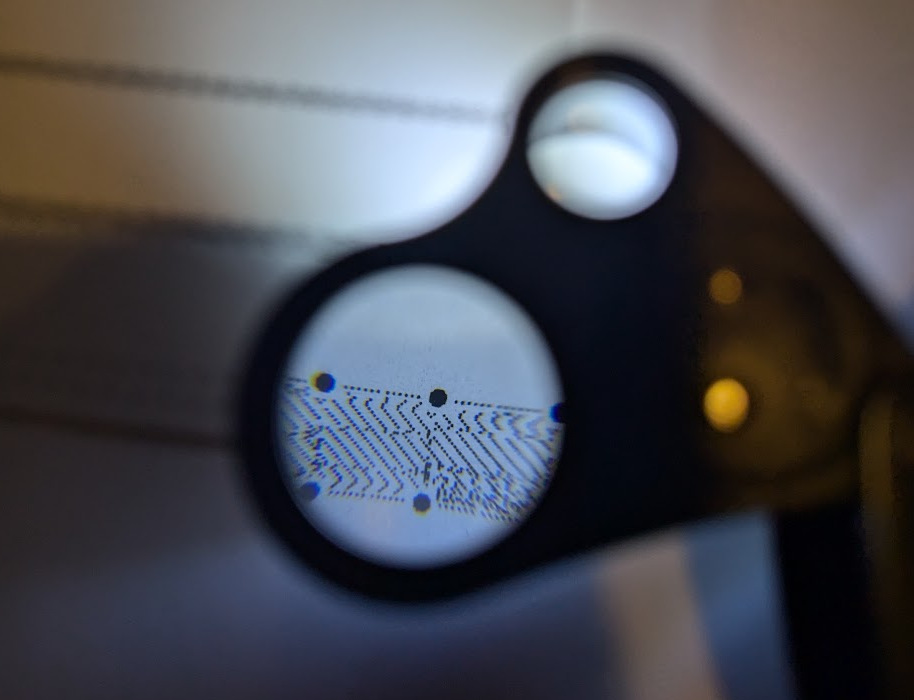
If you try to print a full color (RGB) dotcode image, it will look black to the naked eye. But when examined with a loupe
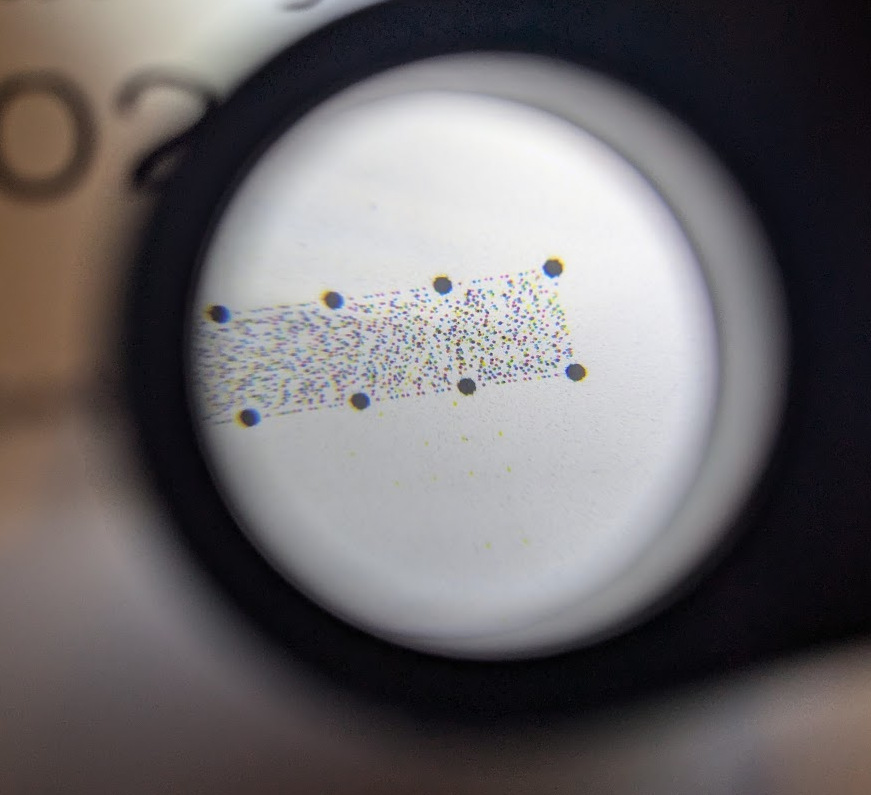
See how the dots are yellow, magenta, all kinds of colors? The E-Reader won't read that correctly! Why printers do this is beyond me.
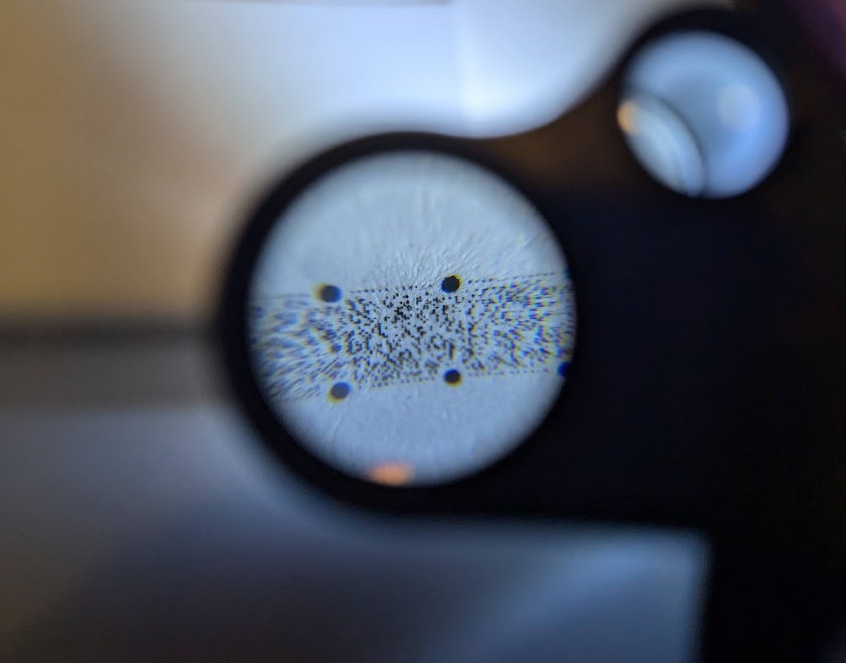
Having the printer print the full color image in greyscale mode will not fix this. You will end up with dots that are varying levels of grey. I never got a color image printed as greyscale to scan correctly at all.
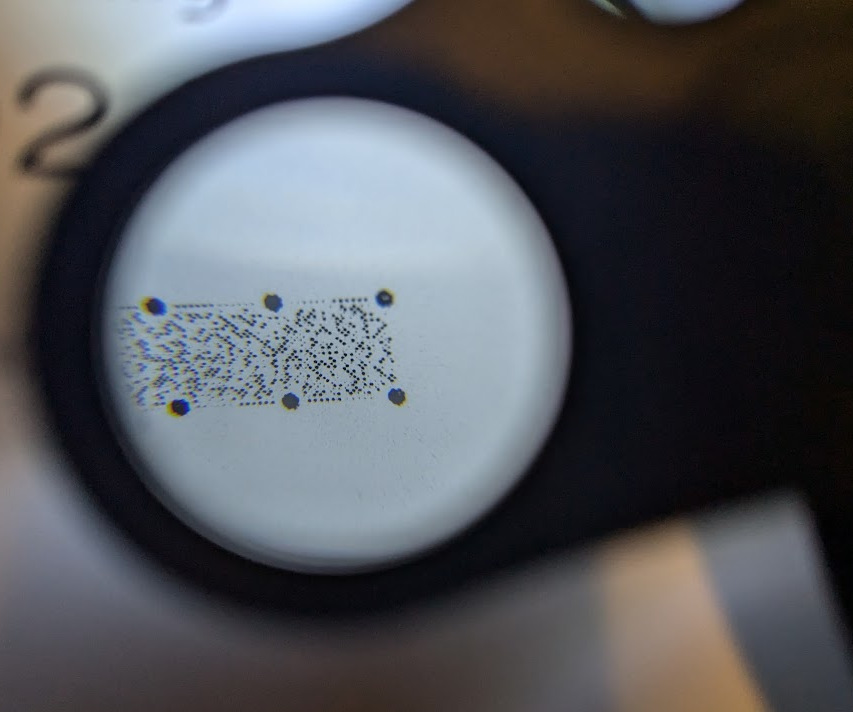
It's a bit hard to tell, but these dots are "fuzzy" and some are a pale grey. The printer took the full color dots above and converted them into greyscale. Why do printers do this? I have no idea.
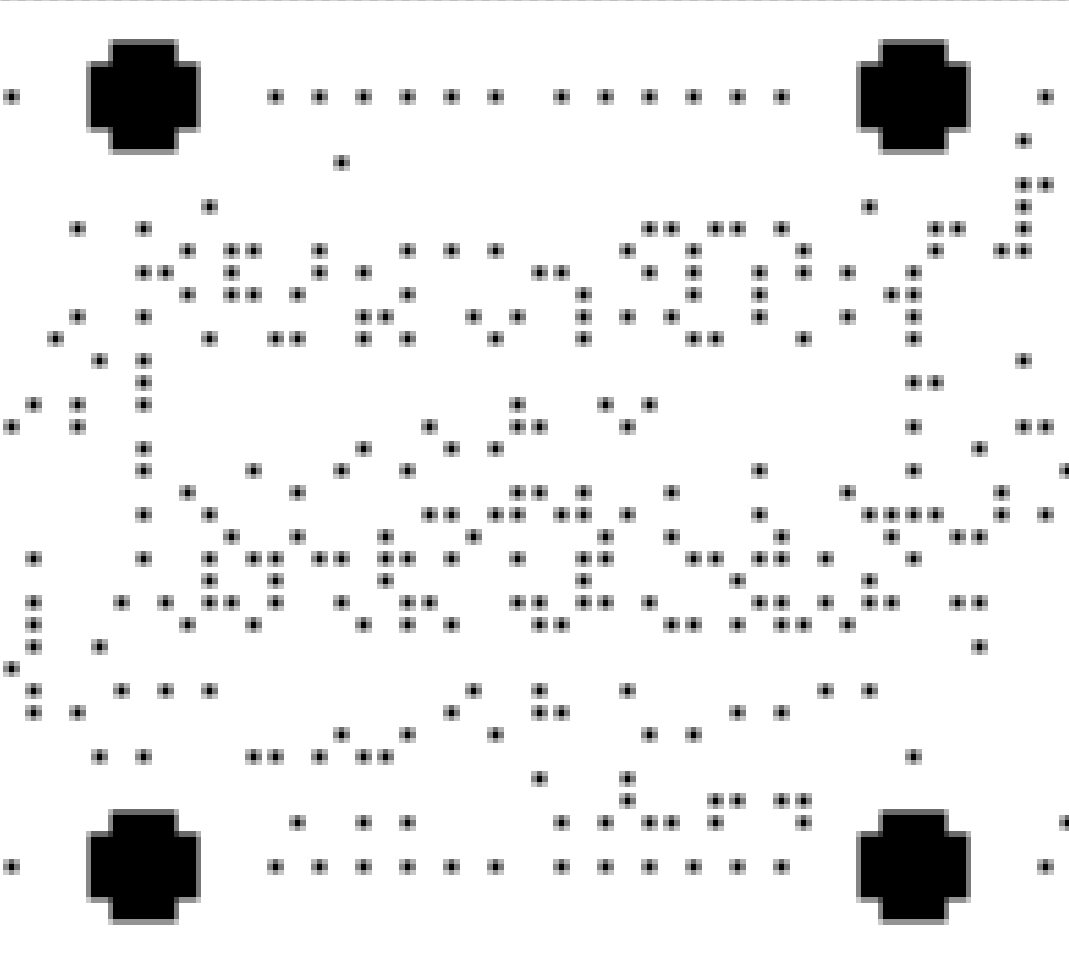
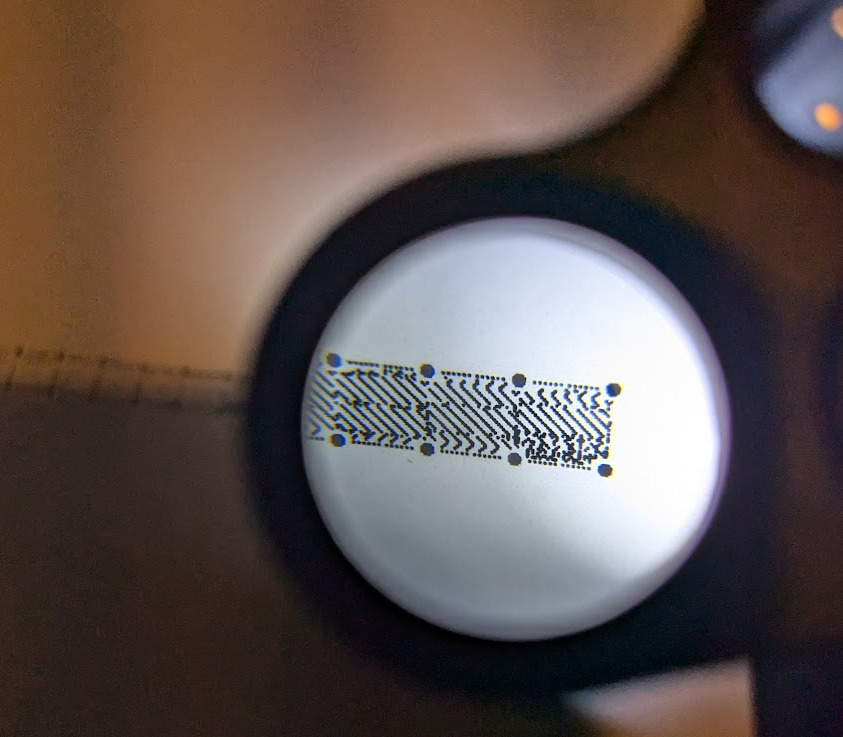
A true, 1-bit, black and white image, will produce very solid, vibrant black dots
Print at 600 dpi
Official E-Reader cards are 342.39 dots per inch (dpi) according to gbatek. That is a strange dpi that regular digital printers won't recreate. You generally have the choice of 300 dpi, 600, or 1200 if you use a really high end printer. I have found 300 is too grainy and does not work. I have also found 1200 is overkill and not needed. 600 dpi is a nice middle ground, and bonus most modern home printers can print at this dpi.
Here is a 300 dpi print. See how chunky the dots are? I could never get this to work.
Printing at home? An ink printer is better than laser
Most people that successfully print out e-reader cards at home do so on ink printers using glossy photo paper (Canon's Photo Paper Plus Glossy II is often recommended, although I have never used it myself)
The reason ink printers work better is they can work with better paper. The glossy paper designed for laser printers isn't good enough, at least I couldn't find any that would work. It's far thinner and less glossy than the glossy paper meant for ink printers.
Printing at home? Make sure you have a proper driver
I'm a Linux user and my Linux printing setup doesn't have the fully correct print driver for my printer. I use a driver meant for a similar printer, but not one meant for my exact printer model. That is fine for documents and normal day to day printing. But with a mismatched driver, I just could not get high dpi prints at all. When I hooked my printer up to a Windows machine and used the correct driver from the manufacturer, the print quality shot way up. It was like night and day.
If all else fails, take it to a shop
I ended up getting my cards printed at the UPS Store. They have a Ricoh Pro C5300S, which is a very high end, excellent, digital printer.
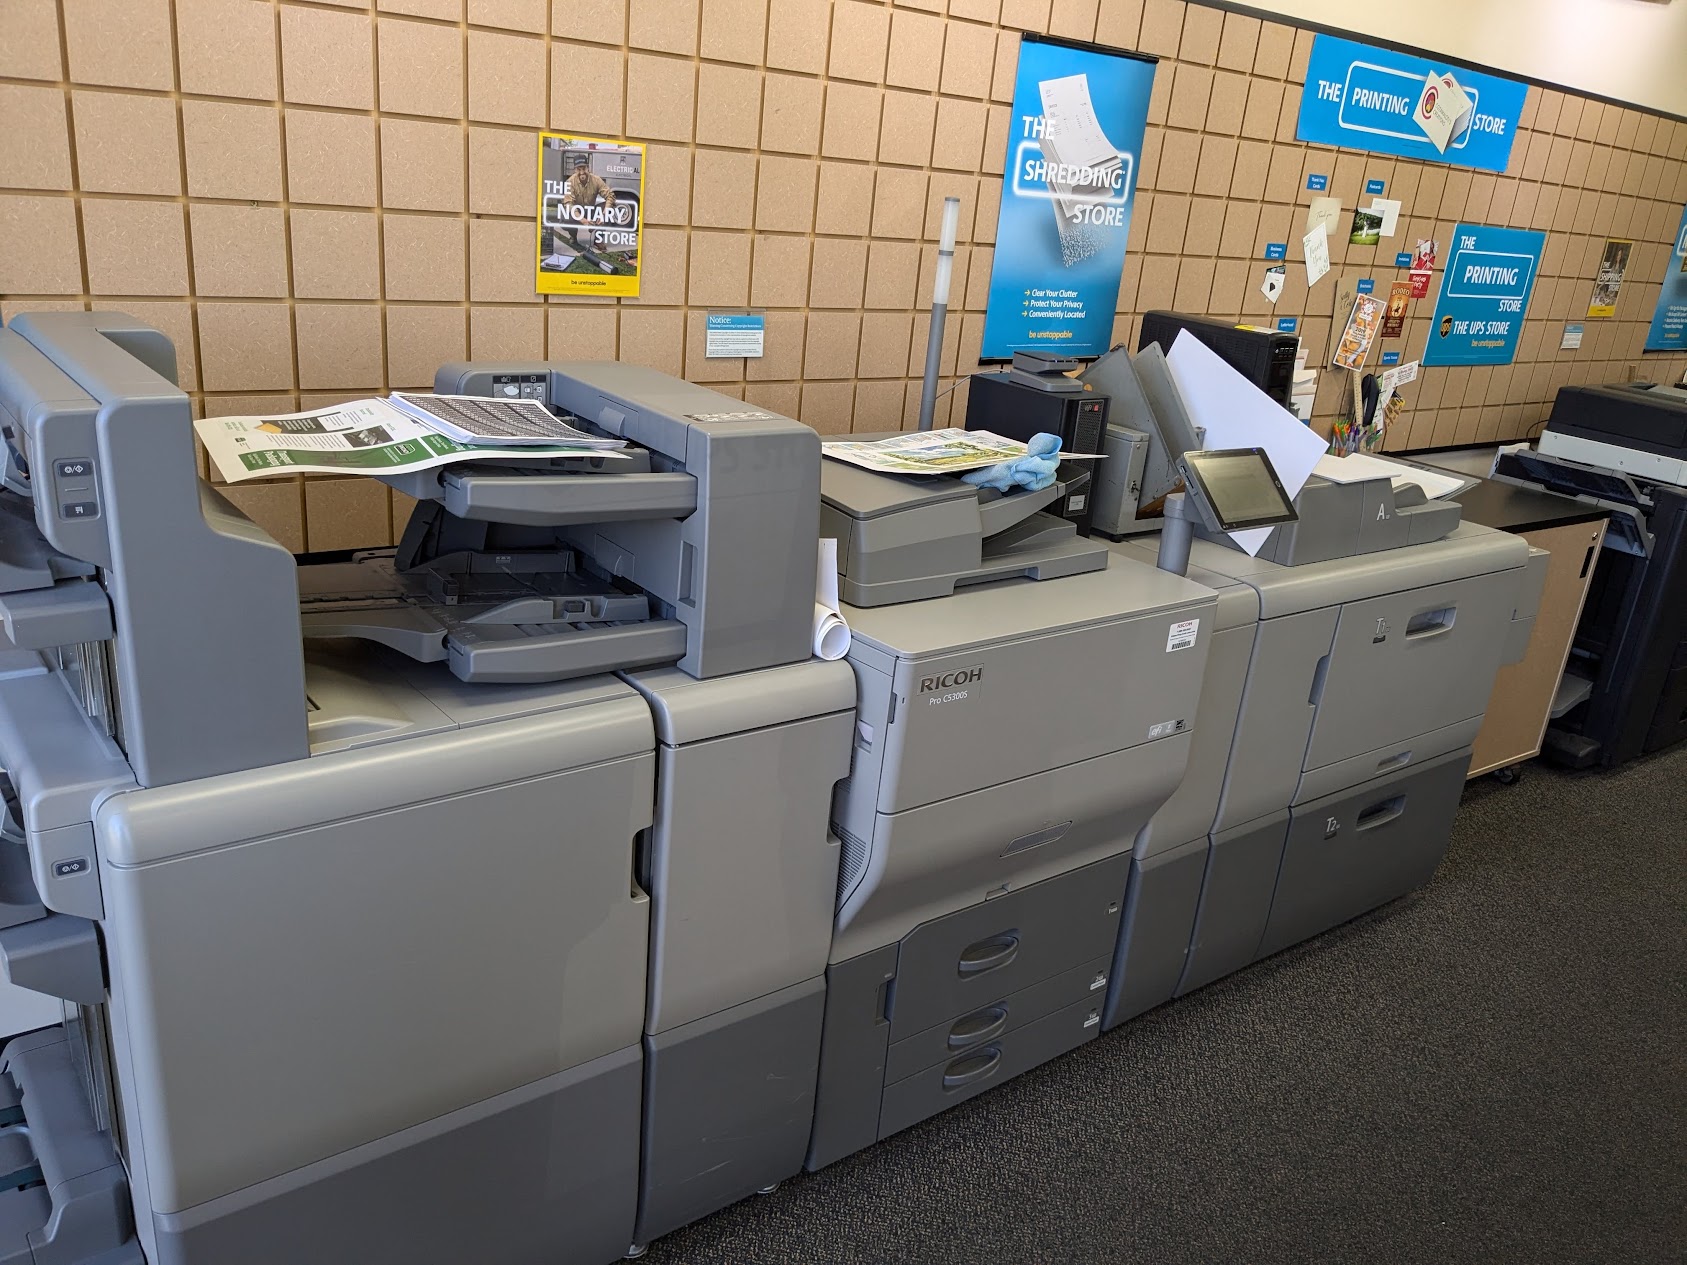
This printer is able to print E-Reader cards that work no problem. It's totally overkill, but hey, it works! But you have to set it up correctly. When working with the employee, make sure
- To use the highest quality, glossy paper they have. It should be thick, card like, and very glossy.
- Make sure your image is 1-bit black and white. Yes even this professional printer did not print full color dotcode images correctly.
- Make sure your image is 600 dpi and that the printer prints at 600 dpi.
After a print is done, pull out your loupe and compare the dots in the print to an official E-Reader card. They should look very similar. The dots should be solid and pure black, like the image above.
With the printouts from this Ricoh printer, I can get them to scan into an E-Reader 99% of the time, just like real E-Reader cards.
I also tried FedEx Office
I also tried printouts at FedEx Office and I never got any to work. I'm not sure what printers they have, but I can say for sure they aren't giant behemoths like what I found at the UPS store. Also their glossy paper was thin and pretty low quality.
Step by step printing
Here is how I print my cards.
Step one: get a .raw file
You probably want to print rare official cards, like the Pokemon Eon Ticket. I can't help you locate the files, but when you find some you want, make sure they are .raw files. E-Reader cards can come in many formats for reasons I won't get into, but .raw is the final one that can be turned into a dotcode image.
Here is a raw file I made of a simple test program. It has no copyright issues since I wrote it, based on original code from Tim Schuerewegen, so feel free to use it.
Test the .raw file in mGBA
No point in making a card of a faulty file, so best to test it first. Fire up mGBA, load up the E-Reader GBA ROM (which you can obtain by dumping your E-Reader, or, uh, you know...) and then when the E-Reader wants you to scan a card, choose "Scan e-Reader dotcodes...", and choose the .raw file.
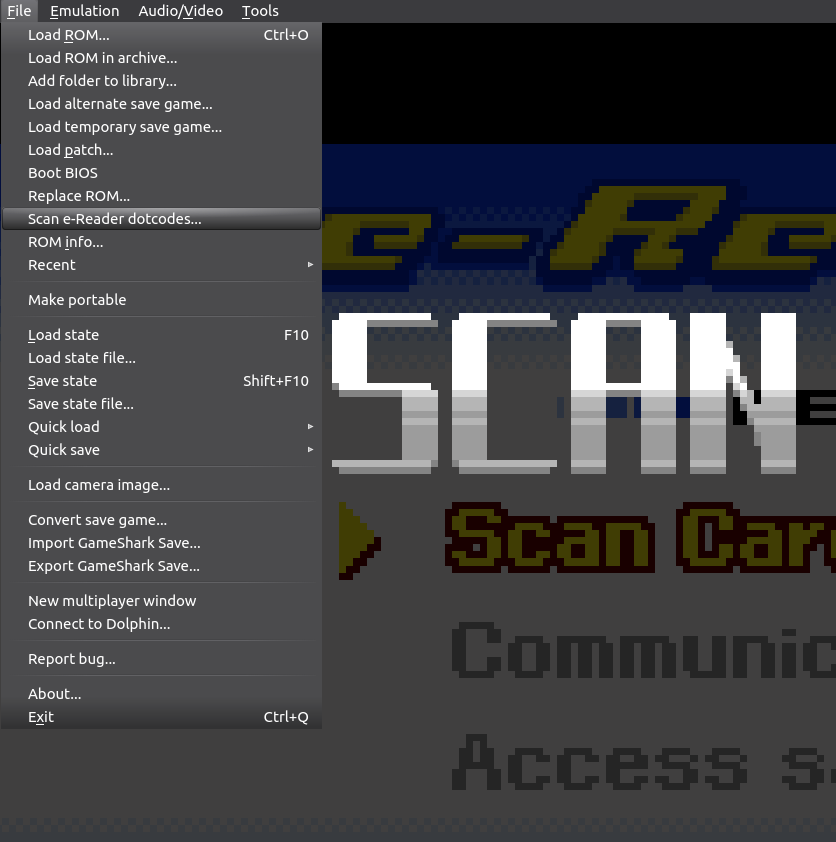
Wait a few seconds, and if successful, you'll see this
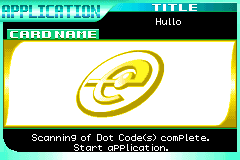
then press A to get into the scanned app

If this doesn't work, there is no point in going further. It won't work on a real E-Reader either. You will probably need to track down another .raw file to try.
Step two: create the image file using raw2bmp
Run the raw file through raw2bmp.exe. If you are on Linux, this app works fine with wine. Not sure about MacOS.
raw2bmp.exe -i helloWorld.ereader.raw -o helloWorld -dpi 600If you don't specify -dpi, it will default to 300. I have found 300 is not high enough, best to go with 600.
You will end up with a .bmp like this

Step three: print it out
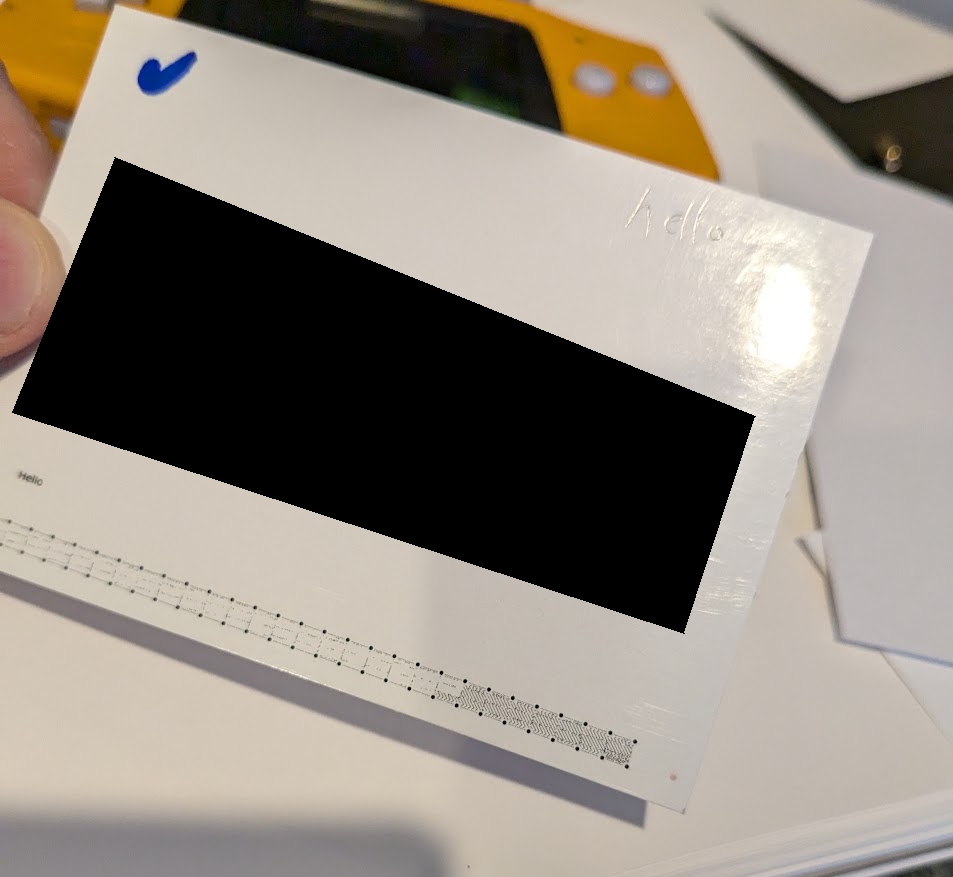
Print this file at 600 dpi on a high quality printer using high quality glossy paper. Here is one of my print outs. I censored it as I had some other stuff on this card that isn't relevant.
Step four: Cut it out
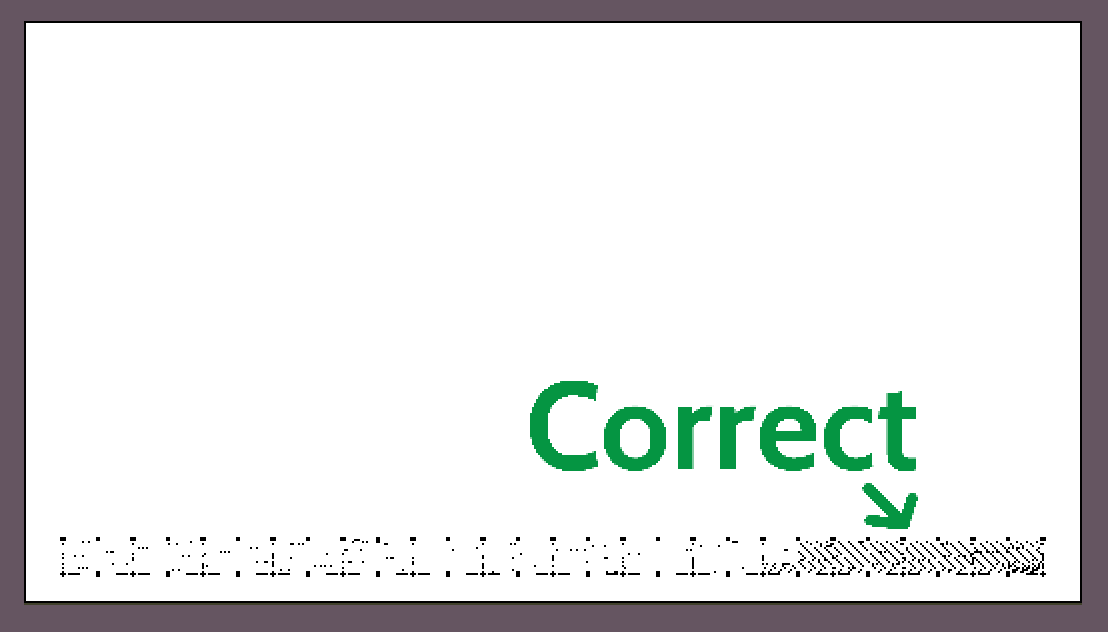
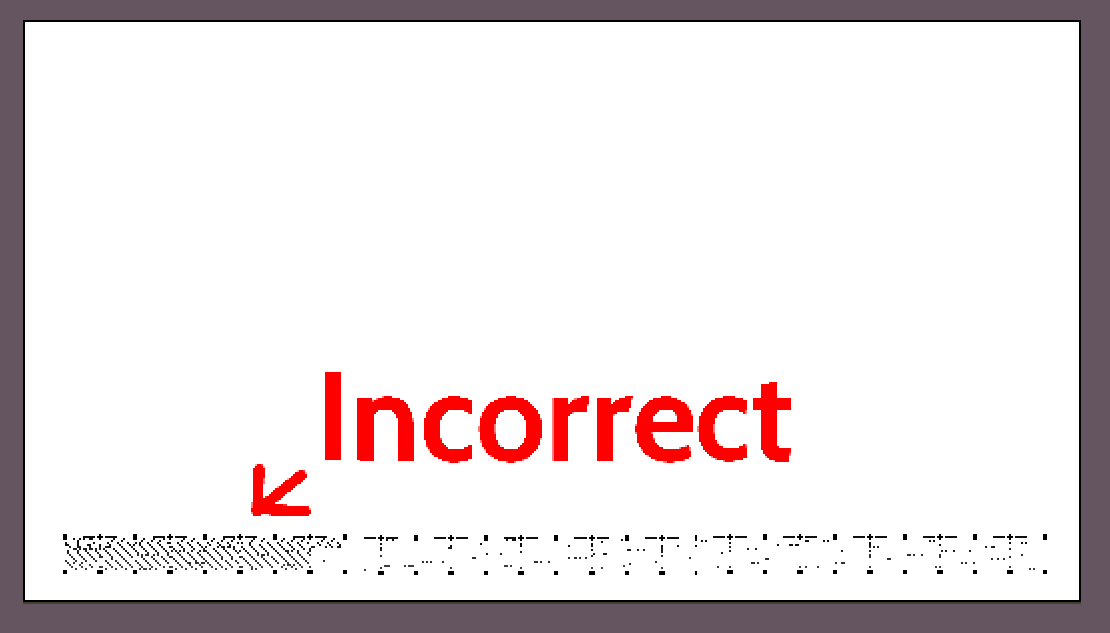
Now you need to trim the paper down to a card size. If you look back above at the dotcard bmp, notice how the right side has more dots? Also notice how the right side with more dots is on the lower right side of the card? That is important. If you orient the dotcode image the opposite way, it won't scan no matter what. It will be pure gibberish to the E-Reader.
Also keep this in mind when making a card that has two dotcode strips. The upper strip needs to be oriented correctly. You can always just make two single strip cards too.
Use a paper cutter if you can
When trimming the card, having a perfectly straight edge along the dotcode helps a lot. That will ensure it scans smoother without jumping around. This is best done with a paper cutter. Oh and make sure to leave about a 3mm gap between the edge of the card and the dotcode strip.
Conclusion
Good luck, this can be frustrating when it doesn't work (believe me, I know...). Hopefully my images and tips can help you be successful.