I recently built a tool that creates animated gifs for Neo Geo video games by extracting the data out of a running emulator. It turned out to be a pretty interesting project, so I thought I'd blog about it.
Some Background
A while back I made this website which is a collection of backgrounds from old 2D fighting games. After gathering every gif I could find scouring the internet, I looked into creating new ones. I didn't relish the idea of taking a million screenshots and piecing together gifs manually, so I looked into other solutions. Not really finding much, I decided to build something.
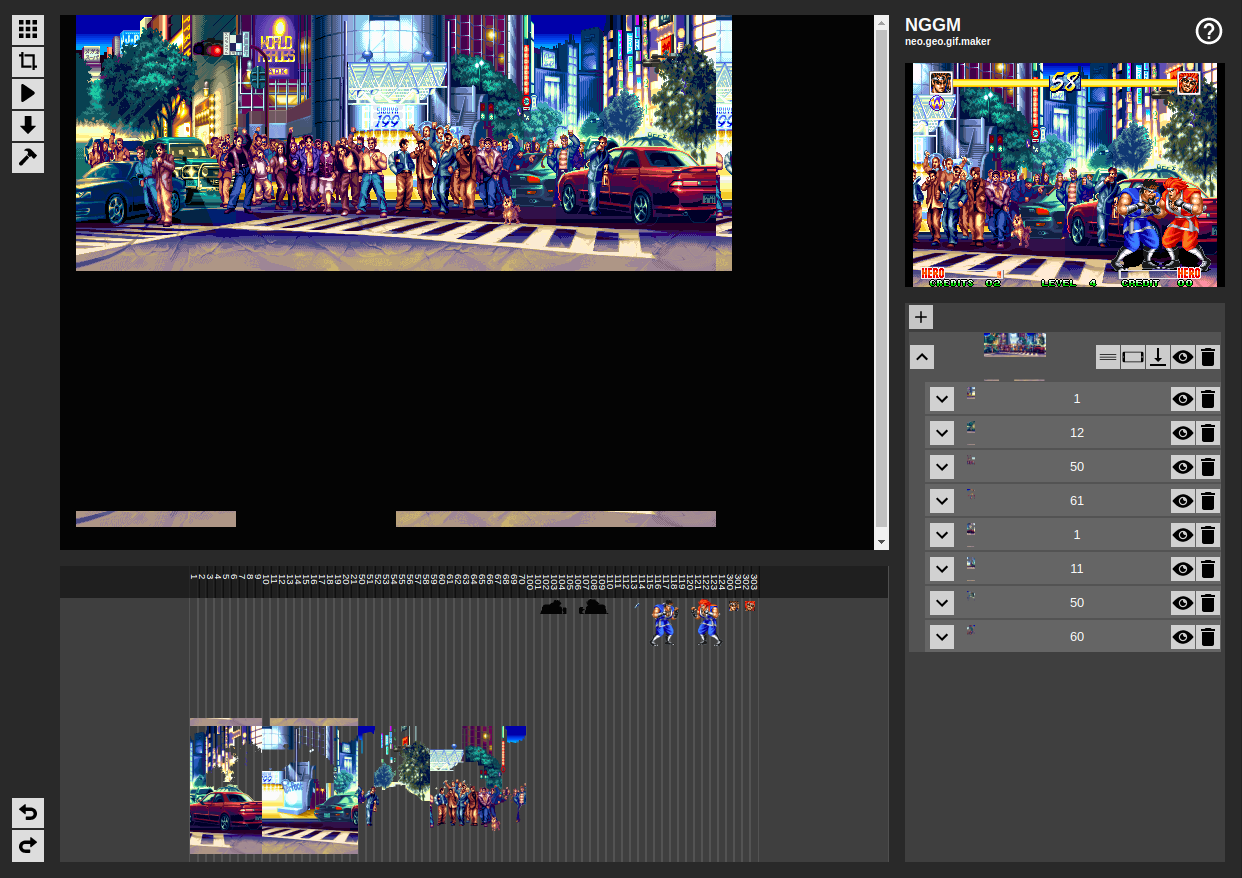
The tool I built uses a running Neo Geo emulator to extract the graphic data and enables the user to drag and drop graphics from the game to create a gif in just a few clicks.
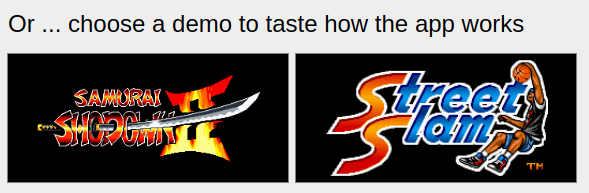
You can play with it here, or check out a video demo below. To truly use it you need a Neo Geo BIOS and a game ROM, but there is a demo mode that lets you try it out without any files. Either choose Samurai Shodown or Street Slam to go into demo mode.
So how does this thing create animated gifs? First we need to do a quick crash course on how graphics work on the Neo Geo.
Let's talk about the Neo Geo
Dedicated video game hardware from around the 90s is really fascinating to me. It is purpose built for gaming, and provides well defined, hardware-based, means of accomplishing many parts of the game. This means that all games for a given system have a lot of commonalities dictated by the hardware. You can almost think of a console like this as a "game engine" built in hardware.
It's this commonality amongst Neo Geo games that enabled me to create a single tool that works with the entire library.
Tile graphics stored in C ROMs
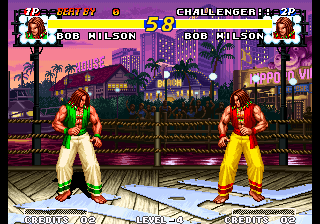
Neo Geo games are made up of many types of ROM chips. The C ROM chips store the game's graphic tiles. For example here is the title screen of Real Bout Fatal Fury (a personal favorite).
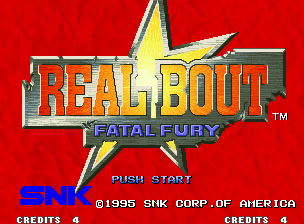
And here are some tiles that make up this screen as shown in a tile viewer I created. You can make out pieces of the screen in the various tiles if you look closely.
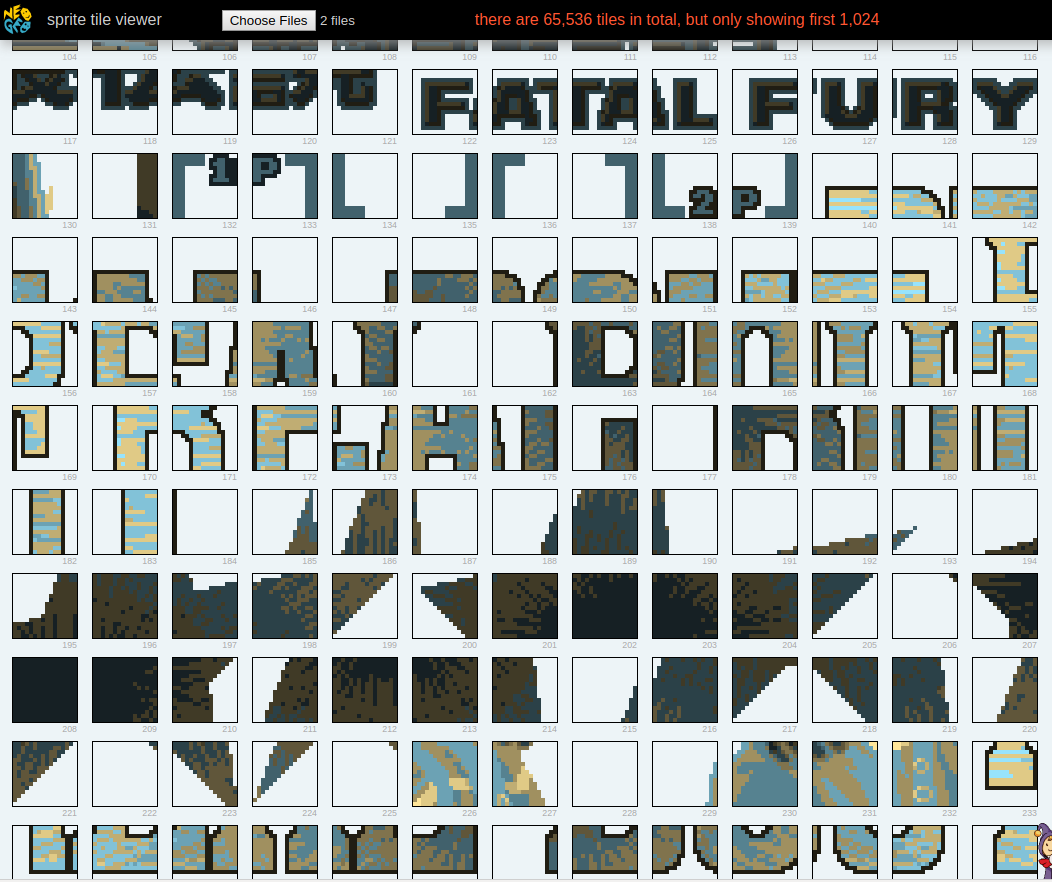
All scenes in Neo Geo games are built by piecing these tiles together. Each tile is 16x16 pixels in size, and each tile can have up to 15 unique colors plus a transparent color. They are stored one after another inside the C ROMs, in a rather convoluted manner. Decoding the data and turning it into a usable format is a bit of work.
Color palettes
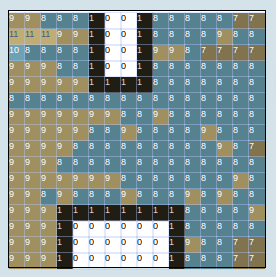
Why are the tiles in the viewer a strange blue/tan color? Because tiles are stored without any specific color information. Since each tile can have up to 15 colors, each pixel in the tile is just a number from 0 to 15 (0 is always transparent). A palette of fifteen colors is established while the game is playing. With both the tile and palette combined, a tangible graphic can be shown on the screen. The high contrast blue/tan palette was chosen for the viewer as most tiles tend to show up well with it.
Storing the tile data separate from the palettes lets the developer get more use out of the tiles. The most common example is when both players of a fighting game choose the same character. Simply assigning each player their own palettes enables them to look distinct while still using the same tiles.
This is just a simple example, Developers got really clever and pulled off all kinds of neat tricks with palettes.
Palettes are dynamic
Unlike tiles, there's no predefined "space" for palettes in Neo Geo ROMs. Instead, they are generated at runtime and placed in a region of memory dedicated to palettes. In other words, tiles are static and palettes are dynamic.
Each game generates its palettes differently. The only way to get a hold of the palettes a game uses, is to run the game and inspect the palette values in RAM.
Combining it all into on-screen sprites
To put something onto the screen in a Neo Geo game, you simply tell the Neo Geo which tiles and palettes to use. You also need to specify the x/y coordinate and various other pieces of metadata about the sprite. This is all specified in a specific area of the Neo Geo's video memory. By simply setting these values in memory, the Neo Geo's graphic unit will make it all happen, as if by magic. The Neo Geo does not have the concept of drawing lines, shapes or bitmaps. The only way to get anything on the screen is to tell the hardware what configuration to put the tiles in.
If you want the nitty gritty details, the Neo Geo dev wiki's page on sprites has it all. It's pretty obtuse, as the target audience is someone who's entrenched in Neo Geo development.
Automatic looping animations
You may have noticed the cheesy infinite looping animations in many old games, such as the people in this background.
For the Neo Geo, these animations are created by setting a flag on the sprite in video RAM. When this flag is set, the Neo Geo will loop through a set of tiles based on a counter it runs, and so the developer can setup simple looping animations by turning this on and defining the tiles such that they form a cohesive animation.
Capturing all of this into an animated gif
We've got lots of different concerns going on for this tool: a running emulator, a user interface, manipulating graphics and then finally creating an animated gif. Turns out the browser is a perfect environment for all of this, as we can do everything we need with JavaScript, HTML5 canvas and Web Assembly. Browsers have gotten so cool!
Web Assembly (WASM) and a Neo Geo emulator
Web Assembly enables one to compile an app written in a language like C and run it in the browser. The Emscripten project takes it several steps further and provides an entire toolchain that makes it pretty easy to retarget existing applications. It provides support for popular libraries like SDL and zlib. As long as the app you are working with falls within the bounds that Emscripten supports, getting it running in Web Assembly is surprisingly easy.
The Gngeo emulator ticks all the boxes here. It's written in C, uses SDL for its graphics, and zlib to work with the ROM files. All of these are supported by Emscripten, and getting Gngeo running in the browser was a breeze! After just a couple of hours and no prior Emscripten or WASM experience, I was up and running. Thanks Emscripten team!
Setting up the memory hooks
Emscripten also makes it easy to bridge from WASM to JavaScript. I wrote some C functions in my fork of Gngeo that exposed the memory addresses I needed.
Uint8* return memory .vid.ram;}
Uint8* return memory .rom.tiles.p;}
Uint8* return current_pal ;}Then I told Emscripten to export these functions during the build, which made them available for example at window.Module._get_tile_ram_addr() in the browser. When these functions are called from JavaScript, they return an integer which is an index into the large Uint8Array that Emscripten creates to be Gngeo's memory heap.
Dumping the sprites
These functions let me poke around in the Neo Geo's memory from JavaScript. Since memory is constantly changing, it only makes sense to reach in when the emulator is paused. Once the background I am interested in gets loaded in the game, I then pause the emulator, and the tool will dump all the current sprites down into a tray at the bottom.

From here I can drag the sprites I am interested in up into the canvas area. This isn't as tedious as it sounds, because I have a lot of metadata available to help me. I know which tiles have been "stickied" together and can group them into a single entity. I also know the relative x/y coordinates of all sprites to each other, so when you drag the second sprite group into the canvas, they automatically position themselves relative to the previous sprites that have already been positioned.
Building up an entire background
To get an entire background you typically have to do it in steps. You manuever the characters to the far left and pause the game, and grab all the current sprites to capture the left side of the arena. Then move to the far right and repeat to grab the right side of the arena.
It's rarely that simple, as there are quirks and gotchas that come up across various games. I added a few other functions to the tool that lets me address common issues found in many games.
Here is a video of me building a background from start to finish.
Converting to a gif
Now with the background captured, we have all the information we need to render it into a gif. This was easy to do using jsgif. What's really neat is the entire process from start to finish takes place in the browser, no backend required.
Capturing the animations
The loop animations are easy to capture in the gif. I simulated what the Neo Geo does to progress the animation by one frame — setting the video RAM values accordingly — then capture the HTML canvas's new state to be the next frame of the gif.
Next steps for the tool
The tool can not convert all backgrounds yet. The biggest problem is the only type of animation it knows how to work with are the simple loop animations described above. Whenever a background has a hand crafted animation, the tool will only capture the first frame of it. You can see that in this background, the guitarists should be playing but stand perfectly still. Adding manual sprite animation support is the biggest feature the tool needs to really grab all backgrounds from all games.
Also there's just lots of tiny little quirks and differences across the games. Some games are really surprising in how they work, so getting them to work with the tool might take a good bit of effort.
This tool is a fun side project for me, so not sure when I'll finally finish it.
The source code for NGGM is here.